AWS CDKでAWSリソースを作成する(3)

はじめに

先日からAWS CDKを使ってAWSリソースを作成してみることをしています。前回までは以下の記事を参照。

今日はAppRunnerからElastiCacheに接続するアプリの環境を作成してみます。アプリケーションは以下の記事で実装したものを使います。

miyohide.hatenablog.com

ネットワークを作成

VPCやセキュリティグループを作成します。最初の実装を変更して、addEgressRuleを設定します。addEgressRuleを設定するにはSecurityGroupのコンストラクタにおいてallowAllOutboundfalseに設定する必要があります。

import { Construct } from 'constructs';
import {
  IpAddresses,
  Port,
  SecurityGroup,
  SubnetType,
  Vpc,
} from 'aws-cdk-lib/aws-ec2';

export class Network extends Construct {
  readonly vpc: Vpc;
  readonly appRunnerSecurityGroup: SecurityGroup;
  readonly cacheSecurityGroup: SecurityGroup;

  // VPCとサブネットを作る
  constructor(scope: Construct, id: string) {
    super(scope, id);

    this.vpc = new Vpc(scope, 'VPC', {
      vpcName: 'myapp-vpc',
      ipAddresses: IpAddresses.cidr('10.0.0.0/16'),
      maxAzs: 2,
      subnetConfiguration: [
        {
          cidrMask: 24,
          name: 'myapp-Public',
          subnetType: SubnetType.PUBLIC,
        },
        // Redis用のサブネット
        {
          cidrMask: 24,
          name: 'myapp-cache',
          subnetType: SubnetType.PRIVATE_WITH_EGRESS,
        },
      ],
      natGateways: 0,
    });

    // App Runnerに設定するセキュリティグループ
    this.appRunnerSecurityGroup = new SecurityGroup(
      scope,
      'AppRunnerSecurityGroup',
      {
        vpc: this.vpc,
        allowAllOutbound: false,
        description: 'for myapp-app-runner',
        securityGroupName: 'myapp-app-runner-sg',
      },
    );

    //Cacheに設定するセキュリティグループ
    this.cacheSecurityGroup = new SecurityGroup(scope, 'CacheSecurityGroup', {
      vpc: this.vpc,
      description: 'for myapp-cache',
      securityGroupName: 'myapp-cache-sg',
    });

    // AppRunnerセキュリティグループからCacheセキュリティグループへのポート6379を許可
    this.appRunnerSecurityGroup.addEgressRule(
      this.cacheSecurityGroup,
      Port.tcp(6379),
    );

    // CacheセキュリティグループにてAppRunnerセキュリティグループからポート6379の通信を許可
    this.cacheSecurityGroup.addIngressRule(
      this.appRunnerSecurityGroup,
      Port.tcp(6379),
    );
  }
}

allowAllOutboundのデフォルト値はtrueでこのまま作成するとセキュリティグループのアウトバウンドは以下のような設定で作られます。

allowAllOutboundに明確にfalseを指定することでaddEgressRuleの設定が有効になり、以下のようなアウトバウンドが設定されたセキュリティグループがつくられます。

ElastiCacheを作成

CDKを使ってElastiCacheを作成します。検証用なので、ノードタイプをcache.t3.microに、ノード数は1とします。

import { SecurityGroup, SubnetType, Vpc } from 'aws-cdk-lib/aws-ec2';
import { CfnCacheCluster, CfnSubnetGroup } from 'aws-cdk-lib/aws-elasticache';
import { Construct } from 'constructs';

interface CacheProps {
  vpc: Vpc;
  cacheSecurityGroup: SecurityGroup;
}

export class Cache extends Construct {
  readonly cacheCluster: CfnCacheCluster;

  constructor(scope: Construct, id: string, props: CacheProps) {
    super(scope, id);

    const { vpc, cacheSecurityGroup } = props;

    const cacheSubnetGroup = new CfnSubnetGroup(this, 'CacheSubnetGroup', {
      subnetIds: vpc.selectSubnets({
        subnetType: SubnetType.PRIVATE_WITH_EGRESS,
      }).subnetIds,
      description: 'Group of subnets to place Cache into',
    });

    this.cacheCluster = new CfnCacheCluster(this, 'CacheCluster', {
      engine: 'redis',
      cacheNodeType: 'cache.t3.micro',
      numCacheNodes: 1,
      cacheSubnetGroupName: cacheSubnetGroup.ref,
      vpcSecurityGroupIds: [cacheSecurityGroup.securityGroupId],
    });
  }
}

App Runnerを作成

App RunnerからElastiCacheに接続するにはVPC Connectorの作成が必要です。また、ElastiCacheの接続先の設定も必要です。今回、接続先は環境変数で設定することとします。具体的なCDKの実装コードは以下の通り。

import { Construct } from 'constructs';
import { SecurityGroup, SubnetType, Vpc } from 'aws-cdk-lib/aws-ec2';
import { Repository } from 'aws-cdk-lib/aws-ecr';
import { CfnCacheCluster } from 'aws-cdk-lib/aws-elasticache';
import { ManagedPolicy, Role, ServicePrincipal } from 'aws-cdk-lib/aws-iam';
import { CfnService, CfnVpcConnector } from 'aws-cdk-lib/aws-apprunner';

interface AppRunnerProps {
  vpc: Vpc;
  repository: Repository;
  appRunnerSecurityGroup: SecurityGroup;
  cacheCluster: CfnCacheCluster;
}

export class AppRunner extends Construct {
  constructor(scope: Construct, id: string, props: AppRunnerProps) {
    super(scope, id);

    const { vpc, repository, appRunnerSecurityGroup, cacheCluster } = props;

    // Roleの作成(ECRに接続するため)
    const accessRole = new Role(scope, 'AppRunnerAccessRole', {
      roleName: 'myapp-AppRunnerAccessRole',
      assumedBy: new ServicePrincipal('build.apprunner.amazonaws.com'),
    });

    accessRole.addManagedPolicy(
      ManagedPolicy.fromAwsManagedPolicyName(
        'service-role/AWSAppRunnerServicePolicyForECRAccess',
      ),
    );

    // VPC Connectorの作成
    const vpcConnector = new CfnVpcConnector(scope, 'MyAppVPCConnector', {
      subnets: vpc.selectSubnets({
        subnetType: SubnetType.PRIVATE_WITH_EGRESS,
      }).subnetIds,
      securityGroups: [appRunnerSecurityGroup.securityGroupId],
    });

    const service = new CfnService(this, 'AppRunnerService', {
      sourceConfiguration: {
        authenticationConfiguration: {
          accessRoleArn: accessRole.roleArn,
        },
        autoDeploymentsEnabled: true,
        imageRepository: {
          imageIdentifier: `${repository.repositoryUri}:latest`,
          imageRepositoryType: 'ECR',
          imageConfiguration: {
            port: '8080',
            runtimeEnvironmentVariables: [
              {
                name: 'REDIS_HOST',
                value: cacheCluster.attrRedisEndpointAddress,
              },
              {
                name: 'REDIS_PORT',
                value: cacheCluster.attrRedisEndpointPort,
              },
            ],
          },
        },
      },
      networkConfiguration: {
        egressConfiguration: {
          egressType: 'VPC',
          vpcConnectorArn: vpcConnector.attrVpcConnectorArn,
        },
      },
    });
  }
}

Stackを作成

これまで作成したものを組み合わせてAWSリソースを作成します。

import { Construct } from 'constructs';
import { Network } from './construct/network';
import { EcrRepository } from './construct/ecr-repository';
import { Cache } from './construct/cache';
import { AppRunner } from './construct/app-runner';
import { Stack, StackProps } from 'aws-cdk-lib';

export class CdkStack extends Stack {
  constructor(scope: Construct, id: string, props?: StackProps) {
    super(scope, id, props);

    // VPCを作成する
    const { vpc, appRunnerSecurityGroup, cacheSecurityGroup } = new Network(
      this,
      'Network',
    );

    // ECRを作成する
    const { repository } = new EcrRepository(this, 'Ecr');

    // Cacheを作成する
    const { cacheCluster } = new Cache(this, 'ElastiCache', {
      vpc,
      cacheSecurityGroup,
    });

    // App Runnerを作成する
    new AppRunner(this, 'AppRunner', {
      vpc,
      repository,
      appRunnerSecurityGroup,
      cacheCluster,
    });
  }
}

デプロイする

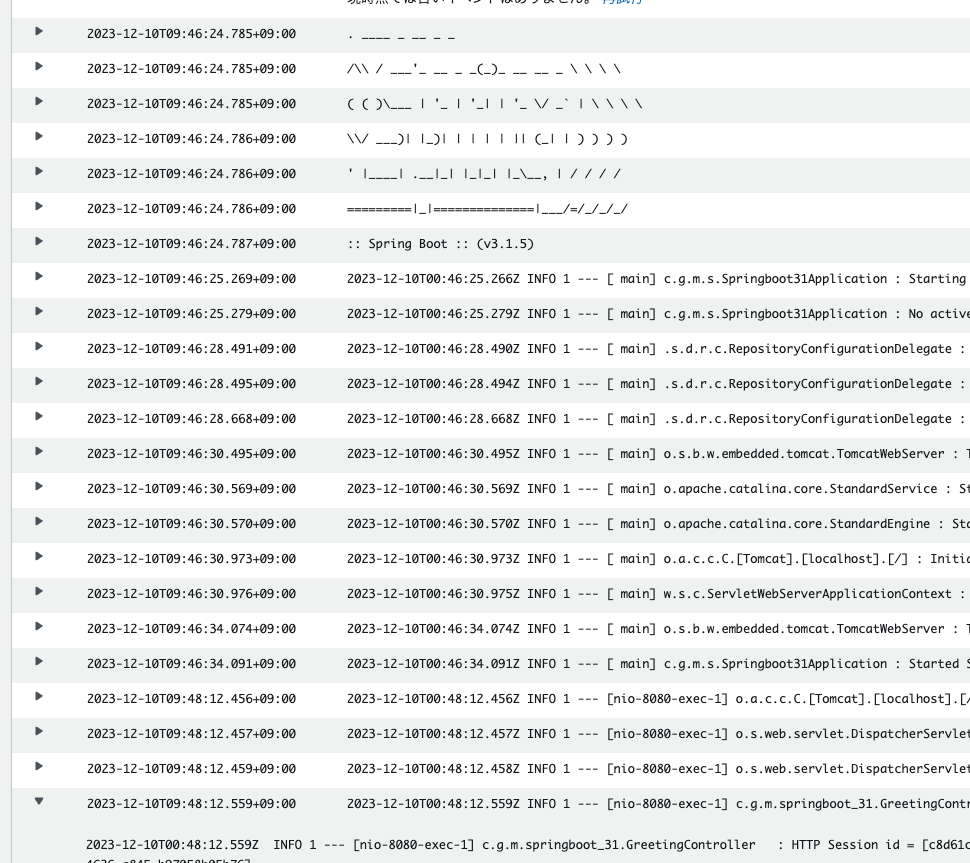
cdk deployを実行するとApp Runnerも作成でき、ElastiCacheにも接続することができました。
AWS CDKでAWSリソースを作成する(2)

はじめに

先日からAWS CDKを使ってAWSリソースを作成してみることをしています。前回は以下の記事を参照。

今日はAppRunnerを作成してみます。

AppRunnerを作成する

今回はコンテナイメージをAppRunnerで動かすことにします。CDKのコードは以下の通り。

import * as apprunner from 'aws-cdk-lib/aws-apprunner';
import * as iam from 'aws-cdk-lib/aws-iam';
import * as ecr from 'aws-cdk-lib/aws-ecr';
import * as ec2 from 'aws-cdk-lib/aws-ec2';
import { Construct } from "constructs";

interface AppRunnerProps {
    vpc: ec2.Vpc,
    repository: ecr.Repository,
    appRunnerSecurityGroup: ec2.SecurityGroup,
}

export class AppRunner extends Construct {
    constructor(scope: Construct, id: string, props: AppRunnerProps) {
        super(scope, id);

        const { vpc, repository, appRunnerSecurityGroup } = props;

        // Roleの作成(ECRに接続するため)
        const accessRole = new iam.Role(scope, 'AppRunnerAccessRole', {
            roleName: 'myapp-AppRunnerAccessRole',
            assumedBy: new iam.ServicePrincipal('build.apprunner.amazonaws.com'),
        });

        accessRole.addManagedPolicy(
            iam.ManagedPolicy.fromAwsManagedPolicyName('service-role/AWSAppRunnerServicePolicyForECRAccess'),
        );

        const service = new apprunner.CfnService(this, 'AppRunnerService', {
            sourceConfiguration: {
                authenticationConfiguration: {
                    accessRoleArn: accessRole.roleArn,
                },
                autoDeploymentsEnabled: true,
                imageRepository: {
                    imageIdentifier: `${repository.repositoryUri}:latest`,
                    imageRepositoryType: 'ECR',
                    imageConfiguration: {
                        port: '8080',
                    },
                },
            },
        });
    }
}

ECRからコンテナイメージが取得できずにハマったのですが、accessRole.addManagedPolicyにてservice-role/AWSAppRunnerServicePolicyForECRAccessポリシーを付与してあげればOKでした。

上記をapp-runnner.tsとして保存し、stack側からは以下のように呼び出してあげたらOKでした。

import * as cdk from 'aws-cdk-lib';
import { Construct } from 'constructs';
import { Network } from './construct/network';
import { EcrRepository } from './construct/ecr-repository';
import { AppRunner } from './construct/app-runner';

export class CdkStack extends cdk.Stack {
  constructor(scope: Construct, id: string, props?: cdk.StackProps) {
    super(scope, id, props);

    // VPCを作成する
    const { vpc, appRunnerSecurityGroup, cacheSecurityGroup } = new Network(this, 'Network');

    // ECRを作成する
    const { repository } = new EcrRepository(this, 'Ecr');

    // App Runnerを作成する
    new AppRunner(this, 'AppRunner', { vpc, repository, appRunnerSecurityGroup });
  }
}

cdk deployを実行すると無事CloudFormation上でデプロイが成功しました。

AppRunnerも想定通りに動いてくれました。

本当はElastiCacheと接続させたいのですが、どうもうまく動いてくれず...。もうちょっと調べてみます。

AWS CDKでAWSリソースを作成する(1)

はじめに

先日からApp RunnerとかElastiCacheとかを使った検証をしていましたが、マネージメントコンソールで作業をするのは時間がかかり、料金節約のためにリソースを削除するのも大変なので、AWS CDKで実装してみることにしました。

プロジェクト作成

プロジェクトは以下のドキュメントを見ながら作業をすることに。

docs.aws.amazon.com

NodeJS環境にてnpx cdk init --language typescriptを実行すればOK。

ネットワーク関係を作成する

各種リソースを作成するためにAWS CDKのAPIドキュメントに目を通します。

docs.aws.amazon.com

まずはVPCを作るので、aws-ec2のVpcクラスに目を通します。

docs.aws.amazon.com

lib/construct/network.tsというディレクトリ・ファイルを作成し、以下の内容として保存します。

import { Construct } from "constructs";
import * as ec2 from 'aws-cdk-lib/aws-ec2';

export class Network extends Construct {
    readonly vpc: ec2.Vpc;
    readonly appRunnerSecurityGroup: ec2.SecurityGroup;
    readonly cacheSecurityGroup: ec2.SecurityGroup;

    // VPCとサブネットを作る
    constructor(scope: Construct, id: string) {
        super(scope, id);

        this.vpc = new ec2.Vpc(scope, 'VPC', {
            vpcName: 'myapp-vpc',
            cidr: '10.0.0.0/16',
            maxAzs: 2,
            subnetConfiguration: [
                // Redis用のサブネット
                {
                    cidrMask: 24,
                    name: 'myapp-cache',
                    subnetType: ec2.SubnetType.PRIVATE_WITH_EGRESS,
                },
                // AppRunner用のサブネット
                {
                    cidrMask: 24,
                    name: 'myapp-Public',
                    subnetType: ec2.SubnetType.PUBLIC,
                }
            ],
            natGateways: 0,
        });

        // App Runnerに設定するセキュリティグループ
        this.appRunnerSecurityGroup = new ec2.SecurityGroup(scope, 'AppRunnerSecurityGroup', {
            vpc: this.vpc,
            description: 'for myapp-app-runner',
            securityGroupName: 'myapp-app-runner-sg'
        });

        //Cacheに設定するセキュリティグループ
        this.cacheSecurityGroup = new ec2.SecurityGroup(scope, 'CacheSecurityGroup', {
            vpc: this.vpc,
            description: 'for myapp-cache',
            securityGroupName: 'myapp-cache-sg'
        });

        // App RunnerセキュリティグループからCacheセキュリティグループへのポート6379を許可
        this.cacheSecurityGroup.addIngressRule(this.appRunnerSecurityGroup, ec2.Port.tcp(6379));
    }
}

あとは、lib/cdk-stack.tsを更新します。

import * as cdk from 'aws-cdk-lib';
import { Construct } from 'constructs';
import { Network } from './construct/network';

export class CdkStack extends cdk.Stack {
  constructor(scope: Construct, id: string, props?: cdk.StackProps) {
    super(scope, id, props);

    // VPCを作成する
    const { vpc, appRunnerSecurityGroup, cacheSecurityGroup } = new Network(this, 'Network');
  }
}

これで実装は完了。

実行する

まずはcdk bootstrapを実行し、CDKに関するリソースを作成します。必要なロールやcdk-からはじまるS3バケットが作成されました。ちなみにこのS3バケットにはDeletionPolicy: Retainが指定されています。

このため、cdk bootstrapで生成された以下スクリーンショットのCloudFormationのスタックを削除してもこのS3バケットは残ります。

あとはcdk deployを実行することでAWSリソースが作成されます。

ちなみに、今回はCloud9上で実行してみたのですが、t2.microですとTypeScriptのビルドがメモリ不足で異常終了しましたので実行するにはt3.small以上のインスタンスが必要かと思います。

削除する

作成したAWSリソースはcdk destroyを実行すれば削除されます。

他のリソースを作成する

VPC以外のリソースを作成してみます。まずはECR。ドキュメントは以下のもの。

docs.aws.amazon.com

実装例は以下のもの。lib/construct/ecr-repository.tsとして保存します。

import { RemovalPolicy } from 'aws-cdk-lib';
import * as ecr from 'aws-cdk-lib/aws-ecr';
import { Construct } from 'constructs';

export class EcrRepository extends Construct {
    readonly repository: ecr.Repository;

    constructor(scope: Construct, id: string) {
        super(scope, id);
        // リポジトリを作成する
        this.repository = new ecr.Repository(scope, 'MyAppRepository', {
            repositoryName: 'myapp-repository',
            removalPolicy: RemovalPolicy.DESTROY,
            imageScanOnPush: false
        });
    }
}

ElastiCacheの作成。ドキュメントは以下のもの。

docs.aws.amazon.com

実装例は以下のもの。lib/construct/cache.ts`として保存します。

import * as ec2 from 'aws-cdk-lib/aws-ec2';
import * as elasticache from 'aws-cdk-lib/aws-elasticache';
import { Construct } from 'constructs';

interface CacheProps {
    vpc: ec2.Vpc
    cacheSecurityGroup: ec2.SecurityGroup
}

export class Cache extends Construct {
    readonly cacheCluster: elasticache.CfnCacheCluster;

    constructor(scope: Construct, id: string, props: CacheProps) {
        super(scope, id);

        const { vpc, cacheSecurityGroup } = props;

        const cacheSubnetGroup =  new elasticache.CfnSubnetGroup(this, "CacheSubnetGroup", {
            subnetIds: vpc.selectSubnets({ subnetType: ec2.SubnetType.PRIVATE_WITH_EGRESS }).subnetIds,
            description: "Group of subnets to place Cache into",
        });

        this.cacheCluster = new elasticache.CfnCacheCluster(this, "CacheCluster", {
            engine: "redis",
            cacheNodeType: "cache.t3.micro",
            numCacheNodes: 1,
            cacheSubnetGroupName: cacheSubnetGroup.ref,
            vpcSecurityGroupIds: [cacheSecurityGroup.securityGroupId],
        });
    }
}

その後、lib/cdk-stack.tsを以下のように更新します。

import * as cdk from 'aws-cdk-lib';
import { Construct } from 'constructs';
import { Network } from './construct/network';
import { EcrRepository } from './construct/ecr-repository';
import { Cache } from './construct/cache';

export class CdkStack extends cdk.Stack {
  constructor(scope: Construct, id: string, props?: cdk.StackProps) {
    super(scope, id, props);

    // VPCを作成する
    const { vpc, appRunnerSecurityGroup, cacheSecurityGroup } = new Network(this, 'Network');

    // ECRを作成する
    const { repository } = new EcrRepository(this, 'Ecr');

    // Cacheを作成する
    const { cacheCluster } = new Cache(this, 'ElastiCache', { vpc, cacheSecurityGroup });
  }
}

あとは、cdk deployを実行すればOK。ElastiCacheの作成には10分ぐらいかかるのでちょっと気長に待ちましょう。

Spring Session Redisの接続先をAmazon ElastiCacheにする

はじめに

Spring Bootアプリの開発でセッション管理をする際にSpring Sessionを使うことが多いかなと思います。今回、Spring Session Data Redisの接続先としてAmazon ElastiCacheを使ってみましたので、その内容を記します。

前提条件

今回、Spring Bootは3.1.5を使用しました。このバージョンが重要で、Spring Boot 2.7までとは設定が異なりましたので、その点も踏まえて記します。

また、EC2上で動かしているSpring BootアプリからAmazon ElastiCacheに対して接続する構成としました。

実装

build.gradleのdependenciesに以下の二つを追記します。

    implementation 'org.springframework.boot:spring-boot-starter-data-redis'
    implementation 'org.springframework.session:spring-session-data-redis'

接続先の設定はapplication.propertiesにて以下のようにします。Spring Boot 3.xから設定項目が微妙に変わっているのが要注意です。

spring.data.redis.host=${REDIS_HOST:localhost}
spring.data.redis.port=${REDIS_PORT:6379}

Spring Boot 2.7までですと、以下の記述がapplication.propertiesに必要でした。

spring.session.redis.configure-action=none

これは、下記ページにあるようにElastiCache RedisにてRedisのconfigコマンドは使用が制限されており、その対応のためです。

docs.aws.amazon.com

Spring Boot 2.7では上記の記述をしていない場合、アプリ起動時(bootRunなど実行時)に以下のメッセージが出て、起動に失敗します。メッセージ内にERR unknown command 'CONFIG'というのがconfigコマンドの使用が制限されていることを示しています。

2023-11-19 06:35:19.826  WARN 27001 --- [           main] ConfigServletWebServerApplicationContext : Exception encountered during context initialization - cancelling refresh attempt: org.springframework.beans.factory.BeanCreationException: Error creating bean with name 'enableRedisKeyspaceNotificationsInitializer' defined in class path resource [org/springframework/boot/autoconfigure/session/RedisSessionConfiguration$SpringBootRedisHttpSessionConfiguration.class]: Invocation of init method failed; nested exception is org.springframework.data.redis.RedisSystemException: Error in execution; nested exception is io.lettuce.core.RedisCommandExecutionException: ERR unknown command 'CONFIG', with args beginning with: 'GET' 'notify-keyspace-events'

ただ、Spring Boot 3.0からは不要となります。

詳細は以下のブログを参照。

tech.excite.co.jp

アプリの実装は以下のような形で。これもSpring Boot 3.xからHttpSessionのimportがjakartaのものになるのが注意点です。

package com.github.miyohide.springboot_31;

import jakarta.servlet.http.HttpSession;
import java.util.ArrayList;
import java.util.List;
import java.util.Set;
import org.slf4j.Logger;
import org.slf4j.LoggerFactory;
import org.springframework.data.redis.core.RedisTemplate;
import org.springframework.web.bind.annotation.GetMapping;
import org.springframework.web.bind.annotation.RequestParam;
import org.springframework.web.bind.annotation.RestController;

@RestController
public class GreetingController {
  private final HttpSession httpSession;
  private final RedisTemplate<String, String> redisTemplate;
  private static final Logger logger = LoggerFactory.getLogger(GreetingController.class);

  public GreetingController(HttpSession httpSession, RedisTemplate<String, String> redisTemplate) {
    this.httpSession = httpSession;
    this.redisTemplate = redisTemplate;
  }

  @GetMapping("/")
  public Greeting greeting(@RequestParam(value = "name", defaultValue = "World") String name) {
    logger.info("HTTP Session id = [" + httpSession.getId() + "]");
    if (httpSession.isNew()) {
      httpSession.setAttribute("name", name);
    }
    return new Greeting(
        httpSession.getId(),
        (String) httpSession.getAttribute("name"),
        httpSession.getCreationTime());
  }

  @GetMapping("/view")
  public String viewSession() {
    Set<String> redisKeys = redisTemplate.keys("spring:session:sessions:*");
    List<String> keysList = new ArrayList<>();
    for (String redisKey : redisKeys) {
      keysList.add(redisKey);
    }
    return keysList.toString();
  }

  @GetMapping("/goodbye")
  public String goodbye() {
    String httpSessionId = httpSession.getId();
    String name = httpSession.getAttribute("name").toString();
    httpSession.invalidate();
    return "bye. HTTP Session id = [" + httpSessionId + "], name = [" + name + "]";
  }
}

実行

環境変数REDIS_HOSTREDIS_PORTAmazon ElastiCacheのエンドポイントの値を入れてSpring Bootアプリを実行すると、Amazon ElastiCacheにセッション情報が格納されていることが確認できます。

ソース

以下にサンプルコードを載せています。

github.com

考察

Amazon ElastiCacheの使用例としてSpring Session Redisを使った例を実装してみました。Spring Bootのバージョン間で若干の差がありますが、単純にセッションの置き場としてでしたら設定する項目が少なければ少ないほど良いと考えており、今回の変更は大変嬉しいです。

ただ、Amazon ElastiCacheは非常に高機能ですし、せっかく使うのであればセッションの置き場だけで使うのはちょっともったいない感じもあります。なんらかの使用用途がないか模索しています。

AWS Lambda関数をCodeDeployでデプロイする

はじめに

AWS Lambda関数をCodeDeployでデプロイすることができたので、ここにまとめておきます。

AWSのドキュメントが以下にあるのですが、試してみたところ動かなかったのでゼロから実装してみました。

docs.aws.amazon.com

言語は慣れていてサクッと動かせるRubyにしてみました。

関連ファイルの作成

まずは関連ファイルを作成します。SAMのテンプレートファイルを作成します。Hookを使わず単純なものにしました。

AWSTemplateFormatVersion : '2010-09-09'
Transform: AWS::Serverless-2016-10-31
Description: A sample SAM template for deploying Lambda functions.

Resources:
  # Details about the mainFunction Lambda function
  mainFunction:
    Type: AWS::Serverless::Function
    Properties:
      Handler: handler.handler
      Runtime: ruby3.2
      AutoPublishAlias: live
      DeploymentPreference:
        Type: Linear10PercentEvery1Minute  # 1分間に10%ずつ更新

アプリはhandler.rbに以下のように実装します。とりあえずの適当に作った関数です。

# frozen_string_literal: true

require "json"
require "date"

# event には {"command": コマンド名, "option": オプション値}という
# Hashで出力される
def handler(event:, context:)
  status_code = 200
  case event["command"]
  when "date"
    result = { date: JSON.generate(Date.today) }
  when "time"
    result = { time: JSON.generate(Time.now) }
  else
    status_code = 400
    result = { "error" => "Must specify 'date' or 'time'" }
  end

  {
    statusCode: status_code,
    body: result,
    message: "message v1"
  }
end

デプロイ

必要なファイルが作成できたらsam packagesam deployを使ってデプロイします。これだけでCodeDeployでAWS Lambda関数がデプロイされます。DeploymentPreferenceLinear10PercentEvery1Minuteと指定したので、1分ごとに更新されることが確認できます。

AWS Lambda関数をaws lambda invokeで実行してみます。

awscli.amazonaws.com

--function-nameに指定するARN文字列にAlias(ここではlive)を付与して実行すると、タイミングによってはExecutedVersionの値が変わることが確認できます。

Hookを実装する

Hookを実装します。こんな感じで実装します。まずはbefore_allow_traffic.rbです。

# frozen_string_literal: true

require 'aws-sdk-codedeploy'
require 'logger'

class BeforeAllowTraffic
  @logger = Logger.new(STDOUT)
  @codedeploy_client = Aws::CodeDeploy::Client.new

  def self.notify_execution_status(event:, status:)
    deployment_id = event['DeploymentId']
    execution_id = event['LifecycleEventHookExecutionId']

    @codedeploy_client.put_lifecycle_event_hook_execution_status(
      {
        deployment_id: deployment_id,
        lifecycle_event_hook_execution_id: execution_id,
        status: status
      })
  end

  def self.handler(event: , context:)
    @logger.info(event)
    status = "Succeeded"

    begin
      notify_response = notify_execution_status(event: event, status: status)
    rescue => e
      @logger.fatal(e)
      status = "Failed"
      notify_response = notify_execution_status(event: event, status: status)
    ensure
      @logger.info("notify_response=[#{notify_response}]")
    end
  end
end

次にafter_allow_traffic.rbです。

# frozen_string_literal: true

require 'aws-sdk-codedeploy'
require 'logger'

class AfterAllowTraffic
  @logger = Logger.new(STDOUT)
  @codedeploy_client = Aws::CodeDeploy::Client.new

  def self.notify_execution_status(event:, status:)
    deployment_id = event['DeploymentId']
    execution_id = event['LifecycleEventHookExecutionId']

    @codedeploy_client.put_lifecycle_event_hook_execution_status(
      {
        deployment_id: deployment_id,
        lifecycle_event_hook_execution_id: execution_id,
        status: status
      })
  end

  def self.handler(event: , context:)
    @logger.info(event)
    status = "Succeeded"

    begin
      notify_response = notify_execution_status(event: event, status: status)
    rescue => e
      @logger.fatal(e)
      status = "Failed"
      notify_response = notify_execution_status(event: event, status: status)
    ensure
      @logger.info(notify_response)
    end
  end
end

CodeDeployのput_lifecycle_event_hook_execution_statusに必要な引数の値はhandlerのeventにHashとして入っているのでそれを読み取ります。

SAMのtemplate.ymlも更新します。

AWSTemplateFormatVersion : '2010-09-09'
Transform: AWS::Serverless-2016-10-31
Description: A sample SAM template for deploying Lambda functions.

Resources:
  # Details about the mainFunction Lambda function
  mainFunction:
    Type: AWS::Serverless::Function
    Properties:
      Handler: handler.handler
      Runtime: ruby3.2
      AutoPublishAlias: live
      DeploymentPreference:
#        Type: AllAtOnce  # 一度に全部更新する
        Type: Linear10PercentEvery1Minute  # 1分間に10%ずつ更新
        Hooks:
          PreTraffic: !Ref BeforeTrafficFunction
          PostTraffic: !Ref AfterTrafficFunction

  BeforeTrafficFunction:
    Type: AWS::Serverless::Function
    Properties:
      Handler: before_allow_traffic.BeforeAllowTraffic.handler
      Runtime: ruby3.2
      Policies:
        - Version: 2012-10-17
          Statement:
            - Effect: Allow
              Action:
                - codedeploy:PutLifecycleEventHookExecutionStatus
              Resource: "*"
  AfterTrafficFunction:
    Type: AWS::Serverless::Function
    Properties:
      Handler: after_allow_traffic.AfterAllowTraffic.handler
      Runtime: ruby3.2
      Policies:
        - Version: 2012-10-17
          Statement:
            - Effect: Allow
              Action:
                - codedeploy:PutLifecycleEventHookExecutionStatus
              Resource: "*"

この段階で、sam deployしたときに権限不足でエラーが出ましたのでCodeDeployのIAMロールにAWSLambdaRoleを付与してあげたら動きました。

これで当初の目的は実装することができました。

AWS Lambda関数をJavaで実装する(5)Powertools for AWS Lambdaを入れてみる

先日より、Flywayを使ってRDSのデータベースマイグレーションをLambda関数を使って実装できないかやってみています。前回までの記事は以下を参照。

今回はPowertools for AWS Lambdaを使ってみます。

Powertools for AWS Lambdaとは

Powertools for AWS LambdaとはLambda向けのユーティリティースイートでトレース、構造化ロギング、カスタムメトリックスができるとのこと。JavaPython、TypeScript、.NETがあります。

以下はJavaの公式ページ。

docs.powertools.aws.dev

使ってみる

本ブログの執筆時点である2023年10月時点でのバージョンv1.17.0ではJava 16までしか対応しておらず、Java 17は対応していませんでした。具体的にはJava 17でコンパイルしようとするとコンパイルエラーとなりました。そのため、アプリやLambdaのランタイムのバージョンを落として実装します。

一番お手軽そうなLoggingを試してみます。マニュアルは以下の通り。

docs.powertools.aws.dev

MavenやGradleに必要なライブラリを追加して、log4j2.xmlを作成しておきます。

ライブラリを入れるだけでは特に何も起きません。Lambda関数のメソッドに対して@Logging(logEvent = true)を付与しておきます。

public class App implements RequestHandler<InputRecord, String> {
  @Override
  @Logging(logEvent = true)  // ←  これを追記
  public String handleRequest(InputRecord input, Context context) {
    // Lambda処理の実装
  }

}

すると、ログにはメソッドの実行情報などが構造化された形で出力されます。

{"timestamp":"2023-10-27T11:47:15.211+0000UTC","instant":{"epochSecond":1698407235,"nanoOfSecond":211010000},"thread":"main","level":"INFO","loggerName":"com.github.miyohide.App","message":"{\"bucketName\":\"xxxxxxxxxxxxxxxxxxxx\"}","endOfBatch":false,"loggerFqcn":"org.apache.logging.log4j.spi.AbstractLogger","threadId":1,"threadPriority":5,"coldStart":"true","functionArn":"arn:xxxxxxxxxxxxxxxxxxxxxxxxx","functionMemorySize":"512","functionName":"myLambda1","functionVersion":"$LATEST","function_request_id":"xxxxxxx-xxxx-xxxx-xxxx-xxxxxxxxxx","samplingRate":"0.0","service":"service_undefined","xray_trace_id":"y-yyyyyyyy-yyyyyyyyyyyyyyyyy"}

ただ、以下のようにcontext.getLogger()で得られたLambdaLoggerを使ったログ出力では構造化されていませんでした。

LambdaLogger logger = context.getLogger();
logger.log("Input data = [" + input.toString() + "]");  // 出力は Input data = [InputRecord{bucketName='xxxxxxxxxxxxxxxxxxxx'}] となる

構造化したログ出力には、以下のようにorg.apache.logging.log4j.LogManagerを使ってLoggerインスタンスを作成することで実装します。

public class App implements RequestHandler<InputRecord, String> {
  private final Logger log = LogManager.getLogger(App.class);

  @Override
  @Logging(logEvent = true)
  public String handleRequest(InputRecord input, Context context) {
    log.info("Input data = [" + input.toString() + "]");
    // 以下省略
  }
}

結果として、以下のように構造化されます。

{"timestamp":"2023-10-27T11:53:01.210+0000UTC","instant":{"epochSecond":1698407581,"nanoOfSecond":210934000},"thread":"main","level":"INFO","loggerName":"com.github.miyohide.App","message":"Input data = [InputRecord{bucketName='xxxxxxxxxxxxxxxxxxxx'}]","endOfBatch":false,"loggerFqcn":"org.apache.logging.log4j.spi.AbstractLogger","threadId":1,"threadPriority":5,"coldStart":"true","functionArn":"arn:xxxxxxxxxxxxxxxxxxxxxxxxx","functionMemorySize":"512","functionName":"myLambda1","functionVersion":"$LATEST","function_request_id":"xxxxxxx-xxxx-xxxx-xxxx-xxxxxxxxxx","samplingRate":"0.0","service":"service_undefined","xray_trace_id":"y-yyyyyyyy-yyyyyyyyyyyyyyyyy"}

Powertools for AWS Lambdaには他にも色々と便利なものがありそうなのでおいおい試してみようかなと。

AWS Lambda関数をJavaで実装する(4)CodeBuildを使ってLambdaアプリをデプロイする(完全版)

先日より、Flywayを使ってRDSのデータベースマイグレーションをLambda関数を使って実装できないかやってみています。前回までの記事は以下を参照。

今回は、CodeBuildを使ってデプロイすることをチャレンジしてみることにしました。前回の続きです。

CodeBuildの設定ファイルbuildspec.ymlにてpost_buildにてsam packagesam deployを実行してあげます。

version: 0.2

phases:
  install:
    runtime-versions:
      java: corretto17
  build:
    commands:
      - ./gradlew clean packageLibs packageSkinny
  post_build:
    commands:
      - sam package --template-file template.yml --output-template-file package.yml --s3-bucket $S3BUCKET
      - sam deploy --template-file package.yml --stack-name aws-flyway-lambda --capabilities CAPABILITY_IAM
artifacts:
  files:
    - '*.zip'
  base-directory: 'build/distributions'

自分がハマったのは、sam deployの処理が終わらなない事象でした。CloudFormationを覗いてみるとREVIEW_IN_PROGRESSのままで止まっていたので、いろいろと見直すと、作成していたtemplate.yml内のTypeの指定が誤っていました(AWS::Serverless::LayerVersionとすべきところをAWS::Serverless:LayerVersionにしていました。:が足りませんでした)。完全版のtemplate.ymlは以下の通りです。

AWSTemplateFormatVersion: '2010-09-09'
Transform: 'AWS::Serverless-2016-10-31'
Description: An AWS Lambda application that calls the Flyway api
Resources:
  function:
    Type: AWS::Serverless::Function
    # 関数の定義
    Properties:
      CodeUri: build/distributions/aws_flyway_lambda-thin-1.0.zip
      Handler: com.github.miyohide.aws_flyway_lambda.MyLambda::handleRequest
      Runtime: java17
      Description: Java function
      MemorySize: 1024
      Timeout: 10
      # Function's execution role
      Policies:
        - AWSLambdaBasicExecutionRole
        - AWSLambda_ReadOnlyAccess
        - AWSXrayWriteOnlyAccess
        - AWSLambdaVPCAccessExecutionRole
      Tracing: Active
      Layers:
        - !Ref libs
  # Layerの定義
  libs:
    Type: AWS::Serverless::LayerVersion
    Properties:
      LayerName: flyway-java-lib
      Description: Dependencies for the flyway java app.
      ContentUri: build/distributions/aws_flyway_lambda-libs-1.0.zip
      CompatibleRuntimes:
        - java17

あとは権限不足でエラーとなりました。Layerを使っていたのでlambda:PublishLayerVersionlambda:GetLayerVersionの権限エラーとなっていたので、付与したら正常終了しました。

もちろん、デプロイしたLambda関数も正常に動くことが確認できました。