Spring BootアプリをAzure Kubernetes Serviceで動かす(2)- YAMLファイルを使わずにデプロイする -

はじめに

先日からAzure Kubernetes Serviceを検証しています。まだまだKubernetesがあまりよくわかっていないのですが、一個ずつ学べていけたらと。

過去のものは以下。

YAMLファイルを書くのが面倒だと言っていたら、同僚から「簡単なものならkubectlコマンドでデプロイするのが一般的ですよ」と言われたのでちょっとやってみました。

コマンドの調査

コマンドを調査してみると以下のページがヒットしました。

kubernetes.io

ここに、以下のコマンドがあるのでこれを実行してみます。

kubectl create deployment nginx --image=nginx

また、kubecl create -hを実行してみるとcreateの次のコマンドはdeployment以外に以下のものが取れるようです。

Create a resource from a file or from stdin.

 JSON and YAML formats are accepted.

Examples:
  # Create a pod using the data in pod.json
  kubectl create -f ./pod.json
  
  # Create a pod based on the JSON passed into stdin
  cat pod.json | kubectl create -f -
  
  # Edit the data in registry.yaml in JSON then create the resource using the edited data
  kubectl create -f registry.yaml --edit -o json

Available Commands:
  clusterrole           Create a cluster role
  clusterrolebinding    Create a cluster role binding for a particular cluster role
  configmap             Create a config map from a local file, directory or literal value
  cronjob               Create a cron job with the specified name
  deployment            Create a deployment with the specified name
  ingress               Create an ingress with the specified name
  job                   Create a job with the specified name
  namespace             Create a namespace with the specified name
  poddisruptionbudget   Create a pod disruption budget with the specified name
  priorityclass         Create a priority class with the specified name
  quota                 Create a quota with the specified name
  role                  Create a role with single rule
  rolebinding           Create a role binding for a particular role or cluster role
  secret                Create a secret using specified subcommand
  service               Create a service using a specified subcommand
  serviceaccount        Create a service account with the specified name
  token                 Request a service account token

serviceを作るためにはkubectl create serviceを実行すればよさそうです。例によってkubectl create service-hをつけてコマンドの使い方を見てみます。

miyohide [ ~ ]$ kubectl create service -h
Create a service using a specified subcommand.

Aliases:
service, svc

Available Commands:
  clusterip      Create a ClusterIP service
  externalname   Create an ExternalName service
  loadbalancer   Create a LoadBalancer service
  nodeport       Create a NodePort service

Usage:
  kubectl create service [flags] [options]

Use "kubectl <command> --help" for more information about a given command.
Use "kubectl options" for a list of global command-line options (applies to all commands).

今回はloadbalancerを作るので、さらにkubectl create service loadbalancer-hをつけてコマンドの使い方を見てみます。

miyohide [ ~ ]$ kubectl create service loadbalancer -h
Create a LoadBalancer service with the specified name.

Examples:
  # Create a new LoadBalancer service named my-lbs
  kubectl create service loadbalancer my-lbs --tcp=5678:8080

Options:
    --allow-missing-template-keys=true:
        If true, ignore any errors in templates when a field or map key is missing in the template. Only applies to
        golang and jsonpath output formats.

    --dry-run='none':
        Must be "none", "server", or "client". If client strategy, only print the object that would be sent, without
        sending it. If server strategy, submit server-side request without persisting the resource.

    --field-manager='kubectl-create':
        Name of the manager used to track field ownership.

    -o, --output='':
        Output format. One of: (json, yaml, name, go-template, go-template-file, template, templatefile, jsonpath,
        jsonpath-as-json, jsonpath-file).

    --save-config=false:
        If true, the configuration of current object will be saved in its annotation. Otherwise, the annotation will
        be unchanged. This flag is useful when you want to perform kubectl apply on this object in the future.

    --show-managed-fields=false:
        If true, keep the managedFields when printing objects in JSON or YAML format.

    --tcp=[]:
        Port pairs can be specified as '<port>:<targetPort>'.

    --template='':
        Template string or path to template file to use when -o=go-template, -o=go-template-file. The template format
        is golang templates [http://golang.org/pkg/text/template/#pkg-overview].

    --validate='strict':
        Must be one of: strict (or true), warn, ignore (or false).              "true" or "strict" will use a schema to validate
        the input and fail the request if invalid. It will perform server side validation if ServerSideFieldValidation
        is enabled on the api-server, but will fall back to less reliable client-side validation if not.                "warn" will
        warn about unknown or duplicate fields without blocking the request if server-side field validation is enabled
        on the API server, and behave as "ignore" otherwise.            "false" or "ignore" will not perform any schema
        validation, silently dropping any unknown or duplicate fields.

Usage:
  kubectl create service loadbalancer NAME [--tcp=port:targetPort] [--dry-run=server|client|none] [options]

Use "kubectl options" for a list of global command-line options (applies to all commands).

これで使い方が大体理解できたので、実際に実行してみます。

実行

まずはnginx Deploymentを作成します。

miyohide [ ~ ]$ kubectl create deployment nginx --image=nginx
deployment.apps/nginx created
miyohide [ ~ ]$ 

あっけなくサクッとできます。Azure Portal上でも作成されていることが確認できます。

その後、Serviceを作成します。最初、loadbalancerの次に指定するNAMEを適当なものに指定してしまい、nginxのページが表示されなかったのですが、Deploymentで指定したものと同じもの(nginx)にしたら無事動きました。

miyohide [ ~ ]$ kubectl create service loadbalancer nginx --tcp=80:80
service/nginx created
miyohide [ ~ ]$ 

これもサクッとできました。Azure Portal上でも作成されていることが確認できます。

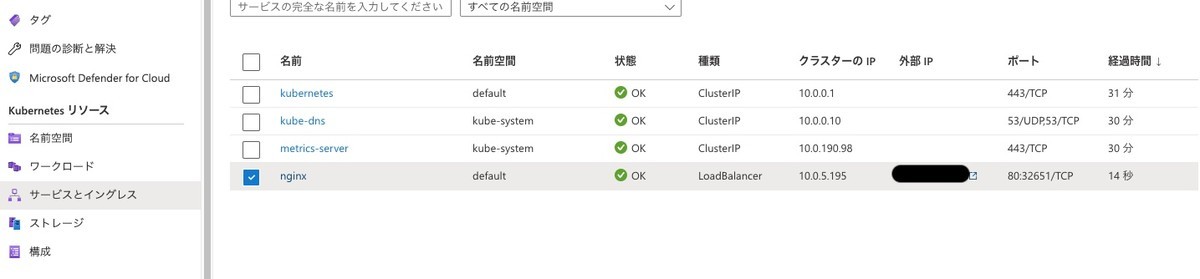
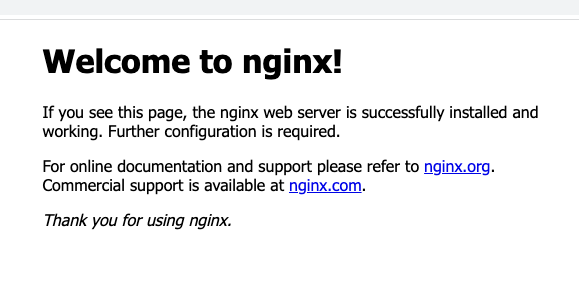
これで外部IPに表示されているアドレスにアクセスすると、nginxのページが表示されます。

YAMLを出力したい

今回はYAMLを使わずにデプロイすることをやったのですが、細かいカスタマイズをするためにYAMLファイルを生成することもできるようです。--dry-run=client -o yamlを指定してあげれば良いようです。

Deploymentの場合、以下の結果となりました。

miyohide [ ~ ]$ kubectl create deployment nginx --image=nginx --dry-run=client -o yaml
apiVersion: apps/v1
kind: Deployment
metadata:
  creationTimestamp: null
  labels:
    app: nginx
  name: nginx
spec:
  replicas: 1
  selector:
    matchLabels:
      app: nginx
  strategy: {}
  template:
    metadata:
      creationTimestamp: null
      labels:
        app: nginx
    spec:
      containers:
      - image: nginx
        name: nginx
        resources: {}
status: {}
miyohide [ ~ ]$ 

Serviceの場合は以下の結果となりました。

miyohide [ ~ ]$ kubectl create service loadbalancer nginx --tcp=80:80 --dry-run=client -o yaml
apiVersion: v1
kind: Service
metadata:
  creationTimestamp: null
  labels:
    app: nginx
  name: nginx
spec:
  ports:
  - name: 80-80
    port: 80
    protocol: TCP
    targetPort: 80
  selector:
    app: nginx
  type: LoadBalancer
status:
  loadBalancer: {}
miyohide [ ~ ]$ 

Spring BootアプリをAzure Kubernetes Serviceで動かす(1)

はじめに

最近はKubernetesに関する話を数多く聞くようになり、あまりKubernetes自身を触るのはあまり好みではないんですが、何事もある程度は触っておきたいと思い簡単なアプリを作って動かしてみました。

作業としては以下のことをやります。

  1. Spring Bootアプリを作る
  2. Dockerイメージを作る
  3. Azure Container Registryに登録する
  4. Kubernetesで動かすようにする

1. Spring Bootアプリを作る

動作確認用なので、Springが公開しているサンプルをそのまま実装します。今回は、「Building a RESTful Web Service」を実装してみました。

spring.io

2. Dockerイメージを作る

Spring BootアプリのDockerイメージを作るにはいろんな方法があります。例えば、Spring Boot 2.3ぐらいからデフォルトで./gradlew bootBuildImageを実行すればDockerイメージを作ることができます。

docs.spring.io

ただ、単に私の慣れの問題でJibを使うことにします。

github.com

Azure Container Registryを使う予定なので、build.gradleに以下の設定を行います。

jib.to.image = "リポジトリ名.azurecr.io/spring_boot_on_k8s:${version}"

これで./gradlew jibを使ってDockerイメージのビルドとpush、./gradlew jibDockerBuildでDockerイメージのビルドができます。

3. Azure Container Registryに登録する

作成したDockerイメージをAzure Container Registryに登録します。az acr loginコマンドでAzure Container Registryにログイン後、./gradlew jibでDockerイメージをpushします。

miyohide@tsubame spring_boot_on_k8s % az acr login -n リポジトリ名 && ./gradlew jib
Login Succeeded

Welcome to Gradle 7.5!

Here are the highlights of this release:
 - Support for Java 18
 - Support for building with Groovy 4
 - Much more responsive continuous builds
 - Improved diagnostics for dependency resolution

For more details see https://docs.gradle.org/7.5/release-notes.html


> Task :jib

Containerizing application to リポジトリ名.azurecr.io/spring_boot_on_k8s:0.0.1...
Base image 'mcr.microsoft.com/java/jdk:11-zulu-alpine' does not use a specific image digest - build may not be reproducible
Using credentials from Docker config (/Users/miyohide/.docker/config.json) for リポジトリ名.azurecr.io/spring_boot_on_k8s:0.0.1
Using base image with digest: sha256:c8eb1e53b34068e35922abebd3787099eae4de108d2ba727d0561ea987379457

Container entrypoint set to [java, -cp, @/app/jib-classpath-file, com.github.miyohide.spring_boot_on_k8s.SpringBootOnK8sApplication]

Built and pushed image as リポジトリ名.azurecr.io/spring_boot_on_k8s:0.0.1
Executing tasks:
[==============================] 100.0% complete


BUILD SUCCESSFUL in 23s
3 actionable tasks: 1 executed, 2 up-to-date
miyohide@tsubame spring_boot_on_k8s %

4. Kubernetesで動かすようにする

Azure Kubernetes Serviceで動かすようにします。チュートリアルがあるのでそれに従います。

learn.microsoft.com

途中でてくるYAMLは以下のものを使いました。

apiVersion: apps/v1
kind: Deployment
metadata:
  name: gs-spring-boot-docker
spec:
  replicas: 1
  selector:
    matchLabels:
      app: gs-spring-boot-docker
  template:
    metadata:
      labels:
        app: gs-spring-boot-docker
    spec:
      containers:
      - name: gs-spring-boot-docker
        image: リポジトリ名.azurecr.io/spring_boot_on_k8s:0.0.1
---
apiVersion: v1
kind: Service
metadata:
  name: gs-spring-boot-docker
spec:
  type: LoadBalancer
  ports:
  - port: 80
    targetPort: 8080
  selector:
    app: gs-spring-boot-docker

このYAMLについては、以下のドキュメントを読めば理解できるかと思いますが、今のところはまだ動かしただけ。あとで理解するように努めます。

kubernetes.io

手順通りにやって、ワークロードやサービスにそれぞれ指定したものが表示されます。

動作確認

サービスのところに出てくる外部IPアドレスをクリックすると、アプリが動いていることが確認できます。

今後

先日アナウンスされたAzure Monitor managed service for Prometheusを試そうと考えています。

learn.microsoft.com

Spring Boot ActuatorにはPrometheus向けに各種データを出力することができるので、それを上記の機能で参照することが目的です。

spring.pleiades.io

ソース

この日時点のソースです。

github.com

SFTPでファイルを送受信するためのサーバーをAzure上で構築してみた

はじめに

FTPでファイルをやりとりしたいんだけれども、何かいい手はないか?」という話をいただくことがあります。少し前にAzure Blob StorageでのSFTPサポートがプレビューで提供されたのですが、プレビューということもあって現時点(2022年10月)で本番投入はしにくいです。

learn.microsoft.com

そんな中、Azureのサンプルの中にAzure Container Instance上でSFTPサーバーを起動する方法が記されていました。

learn.microsoft.com

これをやってみました。

実装

上記サイトからリンクされているGitHubリポジトリにあるARMテンプレートやBicepファイルを元に実装してみます。

github.com

個人的にはTerraformのほうが馴染みがあるのでTerraformで実装してみます。

やっていることは単純で、以下のことを実装します。

  1. Azure Storage File Shareを作成する
  2. Dockerコンテナatomz/sftpを使ってSFTPサーバーを起動する
  3. ユーザー名とパスワードの設定は環境変数SFTP_USERSで指定しておく

hub.docker.com

こんな感じの実装になりました。全部のソースは末尾を参照してください。

resource "azurerm_resource_group" "main" {
  name     = "rg-myftp"
  location = var.location
}

resource "azurerm_storage_account" "main" {
  name                     = "st${var.prefix}myftp001"
  resource_group_name      = azurerm_resource_group.main.name
  location                 = azurerm_resource_group.main.location
  account_tier             = "Standard"
  account_replication_type = "LRS"
}

resource "azurerm_storage_share" "main" {
  name                 = var.filesharename
  storage_account_name = azurerm_storage_account.main.name
  quota                = 5
}

resource "azurerm_container_group" "main" {
  name                = "aci-myftp-name"
  location            = azurerm_resource_group.main.location
  resource_group_name = azurerm_resource_group.main.name
  ip_address_type     = "Public"
  os_type             = "Linux"
  restart_policy      = "Never"

  container {
    name   = "sftp"
    image  = "atmoz/sftp"
    cpu    = "1.0"
    memory = "1.0"

    ports {
      port     = 22
      protocol = "TCP"
    }

    secure_environment_variables = {
      SFTP_USERS = "${var.sftpuser}:${var.sftppassword}:1001"
    }

    volume {
      name       = "sftpvolume"
      mount_path = "/home/${var.sftpuser}/upload"
      read_only  = false
      share_name = var.filesharename

      storage_account_name = azurerm_storage_account.main.name
      storage_account_key  = azurerm_storage_account.main.primary_access_key
    }
  }
}

実行

Terraformでリソースを作成し、sftpコマンドで接続をしてみました。

miyohide@tsubame 01_exec % sftp sftpuser001@xxx.xxx.xxx.xxx
sftpuser001@xxx.xxx.xxx.xxx's password:
Connected to xxx.xxx.xxx.xxx.
sftp> ls
upload
sftp> cd upload
sftp> pwd
Remote working directory: /upload
sftp> put test.txt
Uploading test.txt to /upload/test.txt
test.txt                                      100%   16     1.4KB/s   00:00
sftp> ls
test.txt
sftp> quit
miyohide@tsubame 01_exec %

mount_pathで指定したパスがディレクトリにあるのでそこに移動してファイルをputします。

putコマンドでファイルをアップロードしたところ、Azure Storage上にファイルが作成されました。

ソース

実装したソースは以下に置いてあります。

github.com

Azure App ServiceのRubyサポートが2023年4月12日に終わるらしい

ちょっと残念なニュース。

Azure App ServiceのRubyサポートが2023年4月12日に終了となるようです。

azure.microsoft.com

現状でもサポートしているRubyは2.7しかなかったり、

Ruby SDKがメンテ終了となったりと

github.com

嫌な予感はしていたのですが...

移行としてはコンテナ化して動かすことを推奨しているようです。

github.com

う〜ん、残念です。

Azure Container AppsのVNet統合を試す(その2)

以前、Azure Container AppsのVNet統合を試してみたのですが、うまく動きませんでした。

miyohide.hatenablog.com

ある程度時間も経っているのでリベンジしてみることにしました。

公式ドキュメント

公式ドキュメントにやり方が書かれているのでContainer Appsの作成はその通りにします。

learn.microsoft.com

これで作成した時点では、インターネットから接続できないのはもちろんのこと、同じVNet上にある仮想マシンからでも接続できないでいます。

これを解決するには、「その他の技術情報」に書かれている「内部サービスの DNS 名前解決を設定するには、専用の DNS サーバーを設定する必要があります。」を実施します。

リンク先がAzure DNSのリンク先であるのが若干不親切ですが、プライベートDNSを作成すれば良いです。

具体的な手順は以下のブログを参考にしました。

kogelog.com

各種設定値は、Container Apps環境のJSONビューを参照しました。

接続

これで接続してみると...あっさりと接続できました。

少しわかりにくいですが、左側に赤丸・黄色丸・緑色丸があるのがローカルのMacから接続したものです。こちらは接続できていません。 一方で、角張ったWindowのものは仮想マシン上のEdgeからアクセスしたもので、これは接続できています。

TerraformでYYYYMMDD_hhmmss形式の文字列をファイル名に追記する

今日は小ネタ。

Terraformでいわゆるタイムスタンプを「YYYYMMDD_hhmmss」形式で出力して、ファイルなどに出力することをやってみました。

Terraformはクラウド上にリソースを作成するという機能が注目されていますが、ローカルファイルを作成することもできます。

registry.terraform.io

タイムスタンプを取得するにはtimestamp()を呼び出します。

www.terraform.io

ここで得られた値をいわゆる「YYYYMMDD_hhmmss」形式で出力するにはformatdate()を呼び出せばよさそうです。

www.terraform.io

これを使って以下のようなものを作りました。

locals {
    ts = formatdate("YYYYMMDD_hhmmss", timestamp())
}

resource "local_file" "helloworld" {
    #content = "hello world! at ${formatdate("YYYYMMDD_hhmmss", timestamp())}"
    content = "hello world! at ${local.ts}\n"
    filename = pathexpand("~/hello_${local.ts}.txt")
}

あとはいつも通り、terraform initして、terraform planterraform applyをするとホームディレクトリ以下にhello_+YYYYMMDD_hhmmss.txtというファイルが作成できます。

azureuser@myVM:~/work/tf$ ls -l ~/
total 8
-rwxrwxr-x 1 azureuser azureuser   32 Sep 18 06:52 hello_20220918_065255.txt
drwxrwxr-x 4 azureuser azureuser 4096 Sep 18 05:41 work
azureuser@myVM:~/work/tf$ cat ~/hello_20220918_065255.txt
hello world! at 20220918_065255
azureuser@myVM:~/work/tf$

時刻はUTCなのが注意点ですね。

Azure Container InstanceでAzure Database for PostgreSQL flexible serverに対してpg_dumpを実行してみる(2)

先日試しに動かしてみたAzure Container Instanceでpg_dumpを実行してみることの続きをやってみました。

miyohide.hatenablog.com

Terraform

環境構築を逐一手で行うのが面倒くさかったので、Terraformで構築することにします。

PostgreSQLはこんな感じで用意します。

resource "azurerm_postgresql_flexible_server" "main" {
  name                   = "pg-${var.prefix}-${random_string.name.result}"
  resource_group_name    = azurerm_resource_group.main.name
  location               = azurerm_resource_group.main.location
  version                = "13"
  administrator_login    = var.postgresql_admin
  administrator_password = var.postgresql_password
  storage_mb             = 32768
  sku_name               = "B_Standard_B1ms"
}

resource "azurerm_postgresql_flexible_server_database" "main" {
  name      = var.postgresql_database
  server_id = azurerm_postgresql_flexible_server.main.id
}

resource "azurerm_postgresql_flexible_server_firewall_rule" "main" {
  name                = "allowazure1"
  server_id           = azurerm_postgresql_flexible_server.main.id
  start_ip_address    = "0.0.0.0"
  end_ip_address      = "0.0.0.0"  
}

本当は「Azure内の任意のAzureサービスにこのサーバーへのパブリックアクセスを許可する」を設定する必要があるのですが、どうもTerraformでの設定はうまく動きませんでしたので手で設定することにしました。 単純にazurerm_postgresql_flexible_server_firewall_ruleazurerm_postgresql_firewall_ruleに間違えただけでした...

バックアップファイルをFileShareに格納するためにStorageアカウントを作ります。

resource "azurerm_storage_account" "main" {
  name                     = "st${var.prefix}${random_string.name.result}"
  resource_group_name      = azurerm_resource_group.main.name
  location                 = azurerm_resource_group.main.location
  account_tier             = "Standard"
  account_replication_type = "LRS"
}

resource "azurerm_storage_share" "main" {
  name                 = var.fileshare_name
  storage_account_name = azurerm_storage_account.main.name
  quota                = 5
}

あとはAzure Container Instanceを作成するようにします。

data "terraform_remote_state" "backend" {
  backend = "local"

  config = {
    path = "../99_tfstate/terraform.tfstate"
  }
}

data "azurerm_resource_group" "main" {
  name = data.terraform_remote_state.backend.outputs.resource_group_name
}

data "azurerm_postgresql_flexible_server" "main" {
  name                = data.terraform_remote_state.backend.outputs.postgres_server_name
  resource_group_name = data.azurerm_resource_group.main.name
}

data "azurerm_storage_account" "main" {
  name                = data.terraform_remote_state.backend.outputs.storage_account_name
  resource_group_name = data.azurerm_resource_group.main.name
}

resource "azurerm_container_group" "main" {
  name                = "aci-${var.prefix}-name"
  location            = data.azurerm_resource_group.main.location
  resource_group_name = data.azurerm_resource_group.main.name
  ip_address_type     = "None"
  os_type             = "Linux"
  restart_policy      = "Never"

  container {
    name     = "postgres"
    image    = "postgres:13"
    cpu      = "0.5"
    memory   = "1.0"
    commands = ["pg_dump", "-f", "/aci/backups/pgdump.bin"]
    secure_environment_variables = {
      PGHOST     = data.azurerm_postgresql_flexible_server.main.fqdn
      PGDATABASE = var.postgresql_database
      PGUSER     = data.azurerm_postgresql_flexible_server.main.administrator_login
      PGPASSWORD = data.terraform_remote_state.backend.outputs.postgres_password
    }

    volume {
      name       = "backups"
      mount_path = "/aci/backups"
      read_only  = false
      share_name = var.fileshare_name

      storage_account_name = data.azurerm_storage_account.main.name
      storage_account_key  = data.azurerm_storage_account.main.primary_access_key
    }
  }
}

Terraformのremote_stateってものを使うと、Outputで出力したものを読み込んで使えるようです。今回はランダムに設定したPostgreSQLのデータベース名とかパスワードなどをremote_stateの機能を使って取得するようにしました。

www.terraform.io

Azure Container InstanceはFile Shareをマウントすることができます。今回はpg_dumpコマンドで出力した結果をFile Shareに出力するようにします。コマンドオプションを見ると、-fオプションを指定するとよさそうなので、設定します。

www.postgresql.jp

commandsの部分を["pg_dump", "-f", "/aci/backups/pgdump.bin"]としておくとよさそうです。

実行

Terraformで実行してみると、きちんと動いてくれました。

File Shareにバックアップも格納されていました。

Terraformの全体像

以下に格納しました。

github.com